I did a couple of small prints, to learn the process:
Line etch and aquatint--
4th State:
after a line etch
and 3 aquatints
Preparing the Copper Etching Plate
Measuring and marking with a Shapie,
to cut copper etching plates
Using a shear to cut down
the copper etching plates
Filing to round the edges
of the copper etching plates
Use the coarse file first,
and the fine file next
Filing is grueling
Backing the cooper etching plate
with good contact paper
Cleaning and deoxidizing
the copper etching plate surface
with steel wool
Applying the Ground
Applying the Ground
The "ground" was made from
blue tinted Pledge floor wax
Squirting the "ground"
onto the vertical etching plates
Letting gravity, and the angle,
drain off the excess ground
Drying
I drew one of the etching plates
from a model on the computer
A variety of etching drawing tools
Homemade Echoppe tool;
Takach Press ground off the tip
of an etching needle
at 45 degrees
Preparing the Paper
We tore Hahnemuhle Copperplate paper
Fanning the smaller sheets,
and then measure and marking
the back of each with a pencil,
before tearing
Let the paper soak in tap water
before printing
(if left in overnight,
the paper will develop iron stains)
Etching the Copper Plate
Attach the back of the copper plate
to a long piece of tape,
and lower it into the vertical etching bath
(of ferric chloride)
drawn surface face towards the acid bath
Plastic vertical etching tanks
Washing immediately stops the etching process
Clean the Pledge floor wax ground
off with a solution of soda ash
Spraying soda ash onto the plate
First deoxidize with vinegar and salt,
then degrease with Bon Ami
Spraying vinegar onto plate
to deoxidize
Shaking salt onto the vinegar,
then rub into plate with sponge,
and rinse,
to deoxidize
Then shake Bon Ami onto plate,
and rub off with sponge
to degrease
Clean and ready
for inking
Printing
First spread some Akua intaglio ink
onto a glass plate
with a putty knife
Spread ink over surface of etched copper plate,
then scrap off,
all with a small square of cut matboard
Rub the plate with a tarlatan
to take off excess ink
(dirty is fine,
as ink attracts ink)
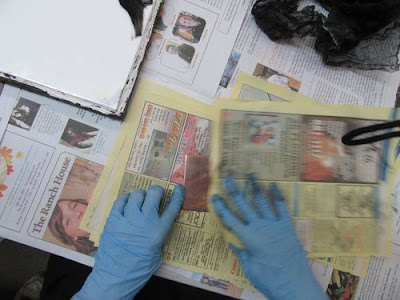
Wipe the remaining ink off
with newsprint
(until you can see no 'halos')
Pull paper out,
and let all the water drip off at an angle
Dry paper between two towels
Place copper plate on press bed,
then paper over the copper plate
Crank and print!
AQUATINT
We can speckle the surface of the copper plate
with ground,
then etch,
to create an aquatint
First we cover the parts of the plate
that we do not want etched in aquatint
with a "resist."
A Sharpie marker works as a "resist"
Plates marked up with Sharpies
to create a resist
Lightly spray the plates
with Pledge Floor Wax ground
using an airbrush,
to create the aquatint
Clean the airbrush immediately with water
and perhaps a bit of soda ash,
so the airbrush does not clog for the next person
Submerge the "aquatinted" plate
in the tank,
design facing the acid bath
Etched and cleaned plate --
notice that the shiny areas
were those protected by the
Sharpie resist
Applying the Sharpie resist again,
before aquatinting plate for the second time
Etched and cleaned plate
One line etch,
two aquatints,
make a "3rd State" print
Resisted with a Sharpie maker for a third time,
before aquatinting the third time
Read about topics covered by the second half of the class:
Soft Ground; soft ground variation -- crayon manner; spitbite; lift ground; crisco lift; selective wiping; chine colle; curating


No comments:
Post a Comment
Note: only a member of this blog may post a comment.